第 7 課
Hands-On: Issuing and Transferring a Stablecoin on XRPL
Get practical with stablecoins—no coding required (but devs welcome too!).
Welcome to the most exciting part of this course: issuing and transferring your very own stablecoin on the XRP Ledger testnet! This hands-on lesson gives you a real taste of how stablecoins work under the hood—without using real money.
Whether you're a developer ready to dig into code or a non-coder looking for a user-friendly interface, XRPL has tools to meet you where you are. From JavaScript SDKs to the XRP Toolkit GUI, the testnet lets you experiment risk-free.
By the end of this lesson, you’ll have created your own test stablecoin and sent it to another wallet. And if you’re feeling adventurous, we’ve got an extra credit challenge just for you.
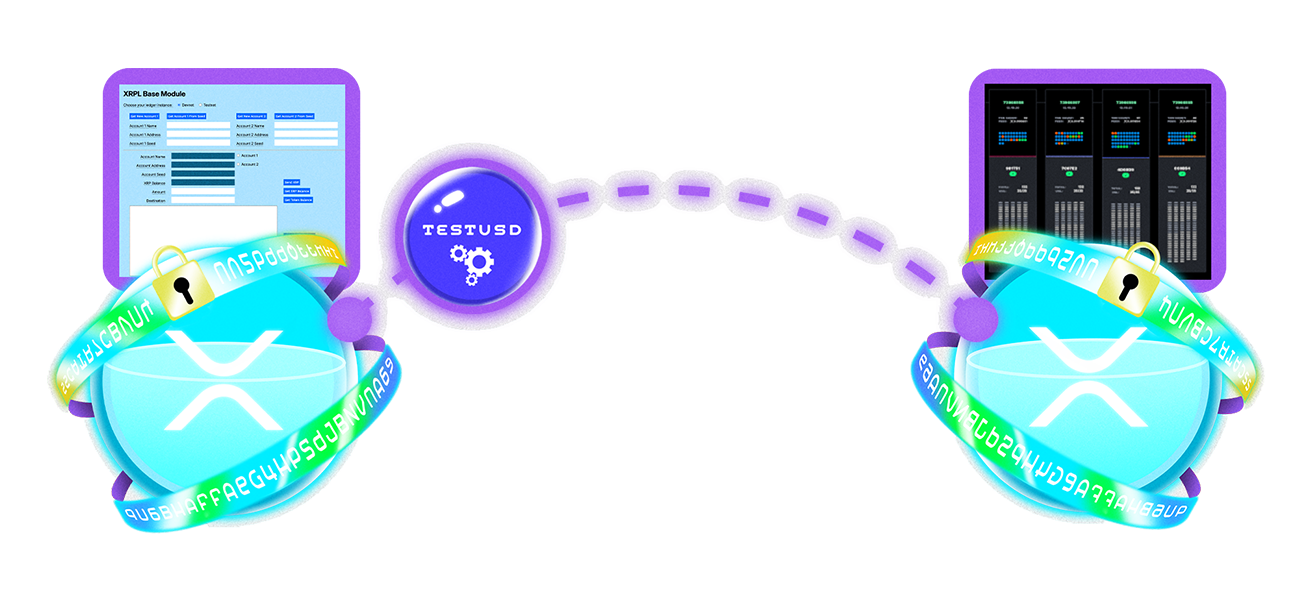
 Let’s get started! You’ll need two accounts on the XRPL testnet—an issuing account and a receiving (or distribution) account. You can set these up with tools like XRP Toolkit or directly via the SDKs.
Here are your options:
For Non-Coders: Use XRP Toolkit, a user-friendly platform for managing XRP assets. It charges only minimal XRPL transaction fees (less than 0.000012 XRP) and supports wallets like Xaman and Ledger, enhancing security and accessibility for non-coders.
Let’s get started! You’ll need two accounts on the XRPL testnet—an issuing account and a receiving (or distribution) account. You can set these up with tools like XRP Toolkit or directly via the SDKs.
Here are your options:
For Non-Coders: Use XRP Toolkit, a user-friendly platform for managing XRP assets. It charges only minimal XRPL transaction fees (less than 0.000012 XRP) and supports wallets like Xaman and Ledger, enhancing security and accessibility for non-coders.
 Here are some essential tools and resources you’ll want to bookmark:
🔧 Tech Tools & Docs:
Here are some essential tools and resources you’ll want to bookmark:
🔧 Tech Tools & Docs:
 Even in a testing environment, it’s important to understand the security features that make stablecoins on XRPL safe and flexible:
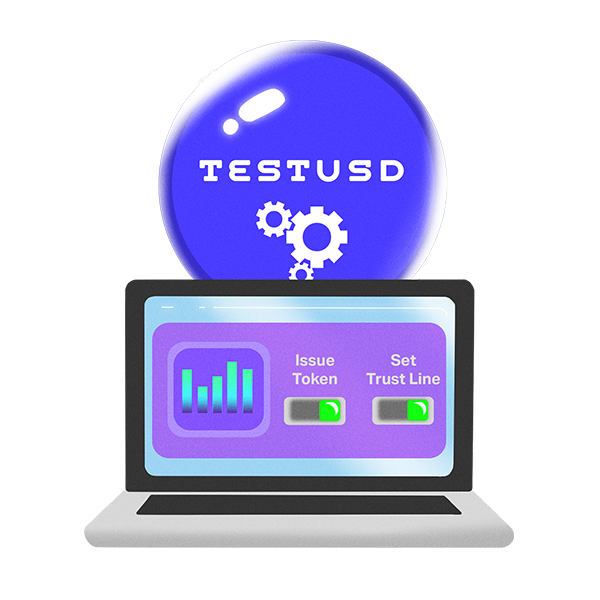
Issue a Test Stablecoin on the XRPL Testnet
Let’s get started! You’ll need two accounts on the XRPL testnet—an issuing account and a receiving (or distribution) account. You can set these up with tools like XRP Toolkit or directly via the SDKs.
Here are your options:
For Non-Coders: Use XRP Toolkit, a user-friendly platform for managing XRP assets. It charges only minimal XRPL transaction fees (less than 0.000012 XRP) and supports wallets like Xaman and Ledger, enhancing security and accessibility for non-coders.
- Visit the site and connect to the testnet.
- Create two wallets and fund them using the XRPL Testnet Faucet.
- From your issuing wallet:
- Set a trust line from your receiving wallet to the issuer.
- Issue tokens like “TESTUSD” to the second wallet.
- Wallet creation and funding.
- Trust line creation.
- Stablecoin issuance (Payment tx with a custom currency code).
- Transfers between accounts.
Here are some essential tools and resources you’ll want to bookmark:
🔧 Tech Tools & Docs:
- XRPL Developer Portal
- XRPL.js GitHub (see XRPL on Github)
- XRPL-Py GitHub (see XRPL on Github)
- XRPL Public API Methods
- XRP Toolkit
- XRPL Testnet Faucet
- XRPL Explorer
- XRP Scan
- Bithomp Testnet Explorer
- Ripple blog (news on stablecoins, platform updates, etc.)
- XRPL Foundation on X
- XRP Learning Portal
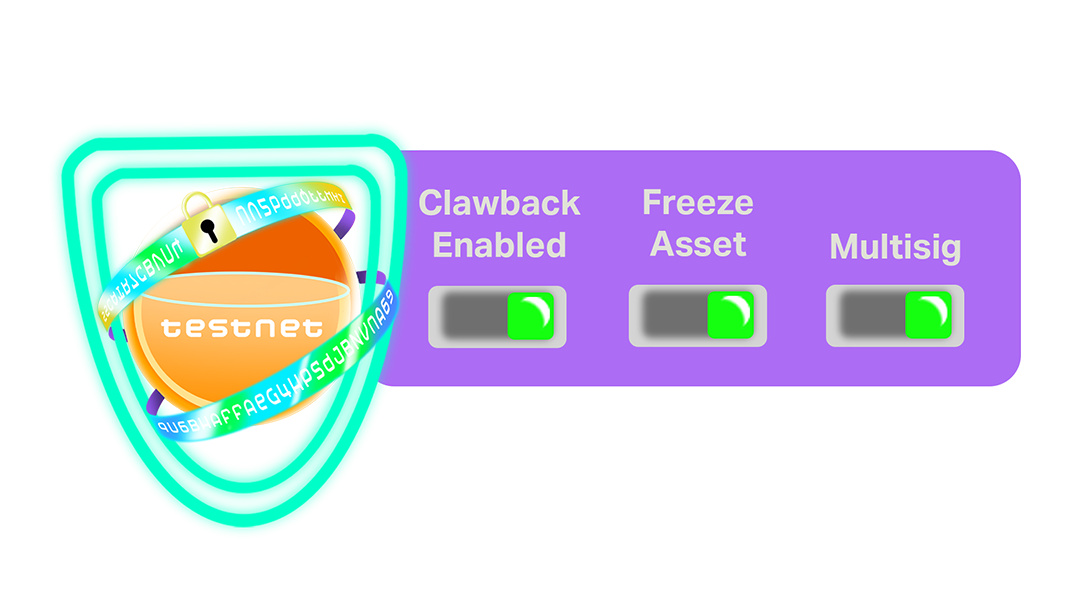
Security Features Even in Test Mode
Even in a testing environment, it’s important to understand the security features that make stablecoins on XRPL safe and flexible:
Clawback
If enabled during issuance, this lets you retrieve your issued stablecoins from accounts flagged for abuse (even on testnet, it’s a useful practice round).Multi-signature (Multisig)
Set multiple signers on your issuing wallet to simulate institutional controls.Freeze Asset
Prevent transfers in critical situations—another compliance-ready feature you can test now. Learning to enable these in a test scenario prepares you for real-world deployment later.🏆 Extra Credit Challenge: Integration Concept
Ready to take it further? Here’s your extra credit: After issuing your stablecoin, imagine how you’d integrate it into a payment system. You don’t have to build it—just outline your idea. Example: “I would build a nonprofit donation app where donors send RLUSD directly to verified wallets, bypassing credit card fees and delays. The app would use XRP Toolkit to set up wallets and XRPL.js to track donations in real-time.” Consider these questions:- Who are your users (retailers, donors, travelers)?
- What problem does your stablecoin solve?
- How would you build trust and ensure compliance?